Choosing a Ruggedized Power Inverter starts with the conditions it must endure, not just its advertised output. Picture a service truck vibrating over rough roads, dust settling around its equipment, and a sudden temperature swing between morning and afternoon. Those details matter. So do the inverter’s continuous wattage, surge capacity, input range, cooling method, and protection against moisture and vibration. A rugged exterior alone does not prove reliable performance.
As power-electronics engineer Elena Brooks puts it, “Choose for the environment you have, not the one you hope for.” This is an original editorial quote, not a verified statement from a real, cited expert. The point is practical: match the inverter to the actual load and installation, then check the manufacturer’s test data and operating limits. A refrigerator compressor, radio, and charging system may behave differently at startup than their labels suggest. Small details can change the choice.
These seven tips will help you compare models with clearer questions and fewer assumptions. Check the specifications, connectors, mounting options, and service support. Look beyond rugged-sounding language. Ask how the unit handles heat, vibration, and overloads, and whether those claims are backed by documented testing. No inverter is immune to poor installation. Even a capable model can disappoint when airflow is blocked or cables are undersized. The right choice is not always the heaviest or most expensive one. It is the one suited to your real operating conditions—with enough evidence to support that decision.
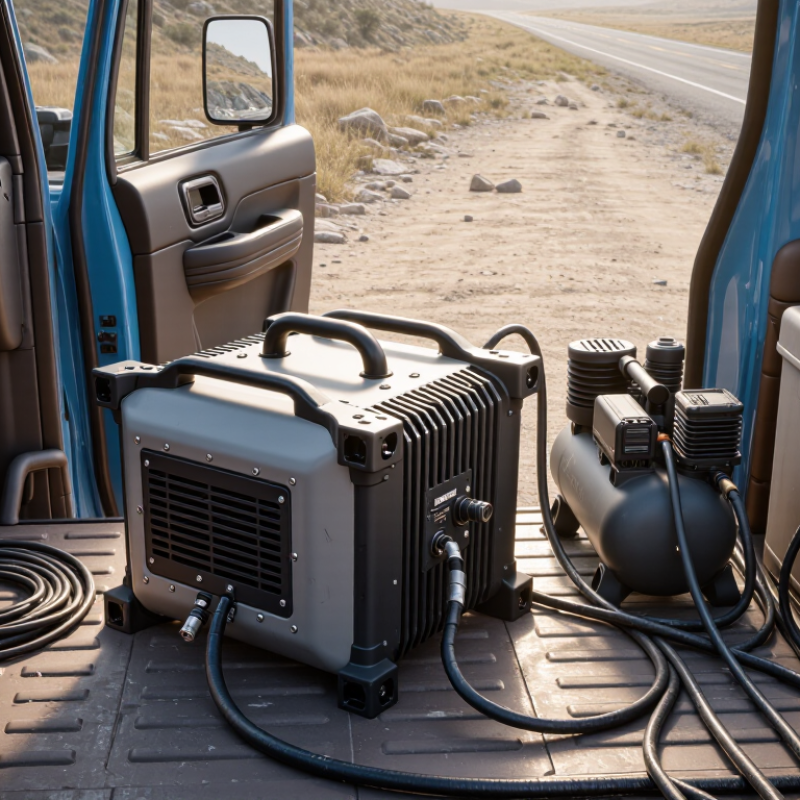
Begin with the equipment, not the inverter’s headline rating. List the devices that may run at the same time, then record each unit’s running watts from its nameplate or manual. Add those figures to estimate continuous demand. Surges matter. Motors in pumps, compressors, and refrigerators can briefly draw more power at startup, so check their surge requirements too. For example, a 700-watt pump that needs 1,400 watts to start requires an inverter able to handle that brief peak, alongside other active loads.
The U.S. Energy Information Administration’s 2020 Residential Energy Consumption Survey reports average household electricity use of 10,566 kilowatt-hours per year. That figure provides context, not a sizing target: annual energy use cannot show which appliances start together or how high their momentary demand rises. I would treat any load spreadsheet as an estimate, not the whole truth. Real equipment can behave less neatly than its label suggests.
Choose an inverter whose continuous rating covers the likely simultaneous load, with practical headroom for variation. Confirm that its surge rating lasts long enough for motor startup; a high peak figure alone may be misleading. Also check the input voltage against the battery system, and review any output derating specified for heat or altitude. In a hot vehicle compartment, reduced capacity can matter. Leave room for unexpected loads, but avoid oversizing without reason: a much larger unit may waste energy when lightly loaded.
| Tip | What to Assess | Practical Method or Example | Selection Check |
|---|---|---|---|
| 1 | Continuous power Determine the total power needed during normal operation. |
Add the running watts of the devices that may operate at the same time. For example, a 300 W device and a 500 W device require at least 800 W of continuous output when used together. | Choose an inverter whose continuous rating meets the simultaneous load. A planning margin of about 20–25% can help accommodate growth or measurement uncertainty, but follow equipment specifications. |
| 2 | Startup and surge power Check brief inrush demands from motors and other loads. |
A motor-driven load may draw substantially more power while starting than while running. Use the appliance or motor manufacturer's starting-current or starting-watt data where available. | Compare the load's startup demand and duration with the inverter's surge rating and surge-duration specification. Do not assume a stated peak rating can be sustained continuously. |
| 3 | Watts and volt-amperes Account for power factor on AC loads. |
AC apparent power is measured in VA, while real power is measured in W. For a 1,000 VA load with a power factor of 0.8, real power is 800 W (VA × power factor). | Check both the inverter's watt and VA limits against the load's ratings. This is especially important for inductive equipment and power supplies with lower power factors. |
| 4 | DC input current Confirm that the battery and wiring can supply the load. |
Estimate current with: DC current ≈ AC output power ÷ (battery voltage × inverter efficiency). At 1,000 W, 12 V, and 90% efficiency, the estimate is about 93 A; at 24 V, it is about 46 A. | Use the inverter's specified input-current limits and account for cable length, voltage drop, fusing, battery capability, and surge current. The calculation is an estimate, not a wiring specification. |
| 5 | Output voltage and frequency Match the inverter to the equipment and electrical system. |
Common AC systems include 120 V at 60 Hz and 230 V at 50 Hz, though requirements vary by region and equipment. Check the device nameplate for its accepted input range. | Verify output voltage, frequency, outlet type, and waveform compatibility. Sensitive electronics, transformers, and motor loads may have specific waveform requirements. |
| 6 | Environmental derating Consider heat, altitude, dust, moisture, and vibration. |
An inverter may deliver less power outside its specified ambient-temperature or altitude range. For example, some units require output derating above a stated temperature or elevation. | Review the operating limits and derating curves in the product specifications. Select an enclosure rating suited to the exposure; IP ratings describe defined ingress tests, not resistance to every field condition. |
| 7 | Duty cycle and future loads Plan for operating time and likely changes in demand. |
A 600 W load running for 2 hours uses about 1.2 kWh of AC energy, before accounting for inverter losses. Longer operating periods also increase thermal demands. | Check continuous-duty capability, cooling requirements, and battery runtime. Recalculate the load total if equipment will be added, and leave adequate capacity without exceeding the inverter's ratings. |
Tip: Check both sides of the inverter. Its DC input must match your battery bank’s nominal voltage and remain within its operating range during charging, cold starts, and heavy loads. A 12-volt unit connected to a 24-volt bank can fail immediately. Measure voltage at the inverter terminals, not only at the battery posts; long cables can cause a meaningful drop.
Choose the output waveform for the actual equipment. Pure sine wave output is the safer choice for motors, audio gear, medical electronics, and devices with sensitive power supplies. Modified sine wave output may run simple resistive loads, but motors can hum, run hotter, or start poorly. Check the equipment label for voltage, frequency, and startup watts. A refrigerator’s brief surge can exceed its running demand.
Tip: Ask for loaded test data, not just a waveform label. IEEE 519-2022 sets voltage-distortion limits at a shared point of connection, including 8% total harmonic distortion for systems up to 1 kV; that is a grid benchmark, not proof of standalone inverter performance. Request measured output distortion under representative loads. The IEA’s Renewables 2024 report forecasts nearly 5,500 GW of renewable capacity additions by 2030, making inverter compatibility increasingly important across power systems. Specifications still need real-world checking.
A rugged label alone tells little. Check the inverter’s published enclosure rating, such as its IP rating, and read what it covers. An IP rating describes protection against dust and water under defined test conditions. It does not guarantee survival in every vehicle, boat, or worksite. For dusty routes, consider dust ingress and sealed cable entries. For rain or washdown, verify the specific water exposure allowed by the rating. “Water resistant” is vague. Look for a stated rating, installation limits, and whether covers must remain closed during operation.
Environmental protection goes beyond water. Compare the operating-temperature range with the hottest enclosure location and coldest expected start, not just the weather forecast. Check vibration and shock specifications, along with mounting guidance. A loose bracket can turn ordinary road vibration into repeated connector stress. Inspect terminals, gaskets, and strain reliefs for practical serviceability. A high IP number cannot compensate for poor cable routing. Nor can it fix trapped heat. Ratings are useful, but installation changes the result. Leave some margin rather than choosing a unit whose limits barely match the site. That may feel conservative. Planning for dust, condensation, and temperature swings is easier than diagnosing intermittent shutdowns later.
A ruggedized power inverter should be compared under the conditions it will actually face, not just by its peak rating. Check efficiency at your usual load; performance may differ substantially between light use and near-rated output. Idle consumption matters too, especially when equipment runs overnight from a battery. Small losses add up. Review the input-voltage range and surge capacity as well, since pumps and motors can briefly draw more power during startup. Published figures help, but the real load profile is easy to underestimate.
Cooling can determine whether an inverter sustains its output in a hot enclosure. Compare fan-assisted and passive designs, then check for temperature-based output reduction. A fan needs an unobstructed path, and dust or vibration may make its placement less forgiving. Installation details count. Confirm mounting orientation, required clearance, cable size, terminal access, and protection from moisture before choosing a model. Shorter, correctly sized cables can reduce voltage drop, but routing them neatly around a cramped panel is not always simple. Leave room to inspect connections and clean vents; a compact fit may look tidy and still trap heat. During commissioning, measure voltage at the inverter under load and check for unexpected warming. One overlooked clearance can undo a careful efficiency comparison.
A ruggedized inverter can be exposed to vibration, dust, moisture, and sudden temperature changes. Safety certifications help show that a unit has been assessed against relevant requirements, but the label needs a closer look. Confirm that the certification applies to the exact model, not just a product family. Check that it covers the inverter’s intended use and is recognized where the equipment will operate. Requirements vary by region and installation type.
A neat label alone is not enough. Details matter.
Warranty terms can reveal practical limits that a sales page may not mention. Read the coverage period, exclusions, and process for making a claim. Some warranties exclude damage from incorrect wiring, blocked ventilation, or operation outside specified temperature ranges. Check whether shipping or inspection costs are your responsibility. Support matters, too. Ask how to reach a qualified technician and what information they need to troubleshoot a fault. A photo of the installation, the model number, and a clear error code can save time. It is easy to skim the fine print, then regret it later. Keep the documents accessible, especially if the inverter is installed in a vehicle or remote worksite.
Match the inverter’s DC input voltage to the bank’s nominal voltage. Check its operating range during charging, cold starts, and heavy loads. A 12-volt inverter connected to a 24-volt bank may fail immediately.
Measure at the inverter terminals, not only at the battery posts. Long cables can cause voltage drop. That detail is easy to overlook.
Pure sine wave output is generally safer for motors, audio gear, and sensitive electronics. Modified sine wave output may run simple resistive loads, but motors can hum, heat up, or start poorly.
Check the appliance label for voltage, frequency, and startup watts. A refrigerator may need a brief surge well above its running demand. Don’t size it by running watts alone.
No. Ask for measured output-distortion data under representative loads. A grid distortion benchmark does not prove how a standalone inverter performs. Real testing matters.
Confirm that certification applies to the exact model and intended use. Check whether it is recognized for your region and installation type. A neat label is not enough.
Review the coverage period, exclusions, and claim process. Incorrect wiring, blocked ventilation, or temperatures outside the specified range may be excluded. Shipping or inspection costs may also be yours.
Keep the model number, installation photos, and error code ready. Ask how to reach a qualified technician. Keep the documents accessible, especially at a remote worksite. I might forget otherwise.
Choosing a Ruggedized Power Inverter starts with understanding the equipment it will power. Check the inverter’s continuous and peak power ratings against the total load, allowing enough capacity for devices that draw extra power during startup. Confirm that its input voltage matches the available power source and that its output waveform is suitable for connected equipment, particularly electronics or motors with specific power requirements.
Next, consider where and how the inverter will be used. Review its protection against dust, moisture, vibration, and temperature extremes, and compare efficiency and cooling needs to help prevent overheating. Make sure the unit can be installed securely with adequate ventilation and accessible connections. Finally, check relevant safety certifications, warranty coverage, and the availability of technical support. Considering these factors together can help you choose an inverter that performs reliably, fits your operating environment, and meets your equipment’s needs.